English

The Secret to Perfect Embroidery: Understanding Underlay Stitches
Introduction: Building a Solid Foundation
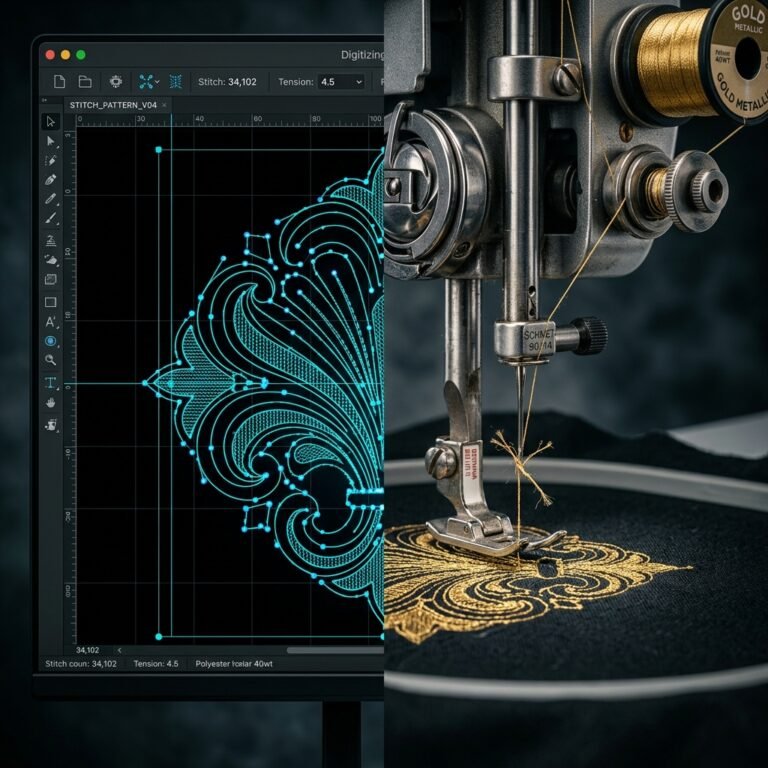
If you were building a luxury home in the United States, you would never pour the concrete foundation directly onto soft, shifting sand without proper structural reinforcement. The house would sag, warp, and crack. Machine embroidery follows the exact same physical rules. The visible top stitches of your logo (the beautiful satin borders and dense tatami fills) need a solid foundation to sit on. In digitizing, this foundation is built using embroidery underlay stitches.
Underlay stitches are the hidden workhorses of the embroidery world. They are laid down on the stabilizer and fabric first, before the visible top cover stitches. Their primary jobs are to secure the fabric to the backing, flatten the fabric nap or pile (such as on fleece, velvet, or pique), prevent sinking, and control the natural push-and-pull distortion of the fabric. Let’s peel back the layers and understand how to master embroidery underlay stitches for perfect results.
1. The Primary Types of Underlay Stitches
A professional manual digitizer will select and combine different types of underlay based on the design geometry and the fabric type. Unlike auto-digitizing software that applies a generic underlay, a manual digitizer carefully programs these four standard varieties:
A. Center Run (Center Walk) Underlay
A center run underlay is a single line of straight running stitches placed directly down the center of a satin column. It is highly efficient and serves to anchor the fabric to the stabilizer quickly. It is the absolute standard for narrow satin borders and is especially critical when dealing with fine text, which you can read more about in our guide on embroidery digitizing small text. It prevents the needle from deflecting and keeps the letters perfectly aligned.
B. Edge Walk Underlay
An edge walk underlay consists of running stitches placed just inside the outer perimeter of a satin column (usually about 0.3mm or 0.4mm from the edge). This creates a physical boundary that keeps the top satin stitches crisp, straight, and clean. It acts as an elevated guide rail, preventing the edges of the satin column from curling inward or sinking into soft knit fabrics like pique cotton.
C. Zigzag Underlay
A zigzag underlay runs down the center of a column in a rapid back-and-forth zigzag pattern. It is perfect for wide satin columns (4.0mm to 8.0mm wide) because it provides volume, height (loft), and binds the stabilizer tightly to the fabric. When combined with an edge walk, it creates a robust framework that supports the top stitches, completely eliminating gaps or gaps on knits.
D. Tatami (Fill) Underlay
Used specifically for large fill areas, a tatami underlay is a light grid of stitches placed perpendicular (90 degrees) to the direction of the final top cover fill. This grid acts as a lattice sheet, binding the fabric fibers to the stabilizer across a wide surface. This prevents the fabric from shifting, puckering, or tearing during high-density fills.
2. Fabric-Specific Underlay Rules
One of the easiest ways to spot a low-quality, auto-digitized file is that it uses the same underlay for every fabric. In manual digitizing, the fabric dictates the underlay style:
- Lightweight Polos (Pique Cotton): Polos are notorious for puckering around the edges. To combat this, we use a light double-zigzag underlay combined with an edge walk. This locks the polo fabric to the tear-away or cut-away stabilizer, preventing stretch. For help with corporate polo branding, see our left chest logo placement guide.
- Fleece & Terrycloth: High-pile fabrics will eat your embroidery; the loops poke through the top stitches, creating a messy finish. We use a dense zigzag underlay combined with water-soluble topping to flatten the nap completely, providing a smooth surface for the top cover satin.
- Denim & Canvas: Woven fabrics are highly stable, meaning they require very little underlay. A simple edge walk or center-run is sufficient. Excessive underlay here will only add unnecessary thickness, making the garment stiff and uncomfortable.
Conclusion: Invest in a Better Foundation
Understanding and applying the correct embroidery underlay stitches is the difference between amateur, puckered designs and flat, high-end, premium retail embroidery. When you order custom digitizing or purchase designs from ABDigitizing, you can rest assured that our expert digitizers evaluate your fabric type and customize the underlay settings manually, ensuring flawless, professional stitch-outs on every machine.